Building Masterpieces in Golang: The Builder Pattern
A Friendly Guide to the Builder Pattern
Introduction
Hey there, fellow Gophers! Are you ready to uncover the secrets of the Builder pattern in Golang? If so, you've landed at the perfect spot! In this creative and friendly blog post, we'll unwrap the Builder pattern, making it simple for you to understand and implement. Plus, we'll bake a pizza (figuratively, of course) to illustrate the pattern in action.
So, put on your chef's hat and let's cook up some Builder pattern magic in Golang!

A Quick Glimpse at the Builder Pattern:
The Builder pattern is a much-loved design pattern that helps you create complex objects step-by-step. It gracefully separates the object's construction process from its representation, allowing the same construction process to create different representations.
This pattern is super handy when you're dealing with objects that have multiple configurations, lots of fields, or optional fields with default values.
Why Gophers Love the Builder Pattern:
In Go, method overloading and default parameters are absent, which makes creating objects with optional parameters a tad challenging. This is where the Builder pattern comes to the rescue! It breaks down the object creation process into smaller, manageable steps, which results in cleaner and more maintainable code.
Building a Pizza: A Real-Life Example of the Builder Pattern:
Let's imagine you're crafting an application for a pizza delivery service. You need to create a "Pizza" object with various possible toppings, crust types, and sizes. Some toppings are optional, and there's a default crust type and size.
Here's how you can implement the Builder pattern in Golang for this appetizing scenario:
- Define the "Pizza" struct:
type Pizza struct {
    size        string
    crust       string
    cheese      bool
    pepperoni   bool
    mushrooms   bool
    olives      bool
}
- Create a "PizzaBuilder" interface with methods for each step in the pizza creation process:
type PizzaBuilder interface {
    SetSize(size string) PizzaBuilder
    SetCrust(crust string) PizzaBuilder
    AddCheese() PizzaBuilder
    AddPepperoni() PizzaBuilder
    AddMushrooms() PizzaBuilder
    AddOlives() PizzaBuilder
    Build() *Pizza
}
- Implement the "PizzaBuilder" interface:
type pizzaBuilder struct {
    pizza *Pizza
}

func NewPizzaBuilder() PizzaBuilder {
    return &pizzaBuilder{&Pizza{size: "medium", crust: "regular"}}
}

func (b *pizzaBuilder) SetSize(size string) PizzaBuilder {
    b.pizza.size = size
    return b
}

func (b *pizzaBuilder) SetCrust(crust string) PizzaBuilder {
    b.pizza.crust = crust
    return b
}

func (b *pizzaBuilder) AddCheese() PizzaBuilder {
    b.pizza.cheese = true
    return b
}

func (b *pizzaBuilder) AddPepperoni() PizzaBuilder {
    b.pizza.pepperoni = true
    return b
}

func (b *pizzaBuilder) AddMushrooms() PizzaBuilder {
    b.pizza.mushrooms = true
    return b
}

func (b *pizzaBuilder) AddOlives() PizzaBuilder {
    b.pizza.olives = true
    return b
}

func (b *pizzaBuilder) Build() *Pizza {
    return b.pizza
}
- Using the "PizzaBuilder" to create a Pizza:
func main() {
    pizzaBuilder := NewPizzaBuilder()
    pizza := pizzaBuilder.SetSize("large").
        SetCrust("thin").
        AddCheese().
        AddPepperoni().
        AddMushrooms().
        Build()

    fmt.Printf("Pizza: %+v\n", pizza)
}
In this scrumptious example, we cooked up a Pizza struct to hold the pizza's details. Next, we crafted an PizzaBuilder interface, outlining the methods needed to build our tasty pizza. We then implemented the PizzaBuilder interface with a pizzaBuilder struct, providing methods to set the size, crust, and mouthwatering toppings. Finally, we used the PizzaBuilder to create a pizza in the main function.
This implementation makes it a breeze to create pizzas with different configurations, without having to deal with a long list of parameters or puzzling constructor functions.
Sure! Let's make this section on the Director in the Builder pattern sound even friendlier:
The Director: The Maestro of the Builder Pattern:

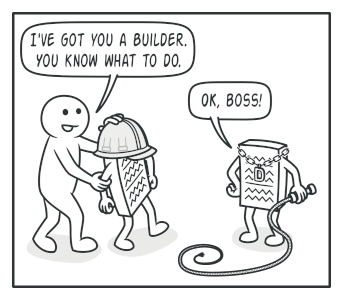
Let's give a warm welcome to the Director, the maestro of the Builder pattern! The Director takes centre stage to conduct the construction process, using a Builder instance to create objects by following a specific sequence of steps. The best part? The Director doesn't need to know the nitty-gritty details of the object being built. It just ensures the correct order of operations and can even create multiple representations of an object using the same construction process.
Now, let's invite the Director to join our pizza party and see how it fits into the example:
- Create a "PizzaDirector" interface:
type PizzaDirector interface {
    MakePizza(builder PizzaBuilder) *Pizza
}
- Implement the "PizzaDirector" interface:
type pizzaDirector struct{}

func NewPizzaDirector() PizzaDirector {
    return &pizzaDirector{}
}

func (d *pizzaDirector) MakePizza(builder PizzaBuilder) *Pizza {
    return builder.SetSize("large").
        SetCrust("thin").
        AddCheese().
        AddPepperoni().
        AddMushrooms().
        Build()
}
- Using the "PizzaDirector" to create a Pizza:
func main() {
    pizzaBuilder := NewPizzaBuilder()
    pizzaDirector := NewPizzaDirector()
    pizza := pizzaDirector.MakePizza(pizzaBuilder)

    fmt.Printf("Pizza: %+v\n", pizza)
}
In this example, we rolled out the red carpet for the PizzaDirector interface, which defines a MakePizza method that takes a PizzaBuilder instance as an argument. We then implemented the PizzaDirector interface with a pizzaDirector struct.
With the baton in hand, the MakePizza method uses the PizzaBuilder to create a pizza with a specific set of mouthwatering configurations (large size, thin crust, cheese, pepperoni, and mushrooms). Finally, in the main function, we instantiated a PizzaBuilder and a PizzaDirector, and let the Director work it's magic to create the perfect pizza.
Introducing the Director into our Builder pattern adds another layer of flexibility, allowing us to control the construction process and create different pizza variations using the same PizzaBuilder instance. Now that's what we call a harmonious performance!
When to Use the Builder Pattern:
The Builder pattern is your go-to design pattern when you need to:
Create complex objects with multiple configurations, fields, or optional fields
Construct immutable objects
Implement a fluent interface
Follow a step-by-step construction process
Handle default values and parameter variations in languages like Golang
Conclusion:
The Builder pattern is a powerful ally in your Golang programming journey. It helps you create complex objects effortlessly, making your code more readable and maintainable. With our friendly guide and the delightful pizza example, you're now ready to bring the Builder pattern to life in your projects.
So, share this blog post with your fellow Gophers, and stay tuned for more fun-filled content on Go programming. Happy coding, and don't forget to enjoy a slice of pizza!

